My Vehicle
Cart
Straight answers on 12V power from the 12 Volt Direct team. Whether you're building a dual battery system, running Starlink off-grid, choosing a camping fridge or sizing a generator, these guides help you get it right the first time.
Got a question about your setup? Contact our team and we'll check it with you.
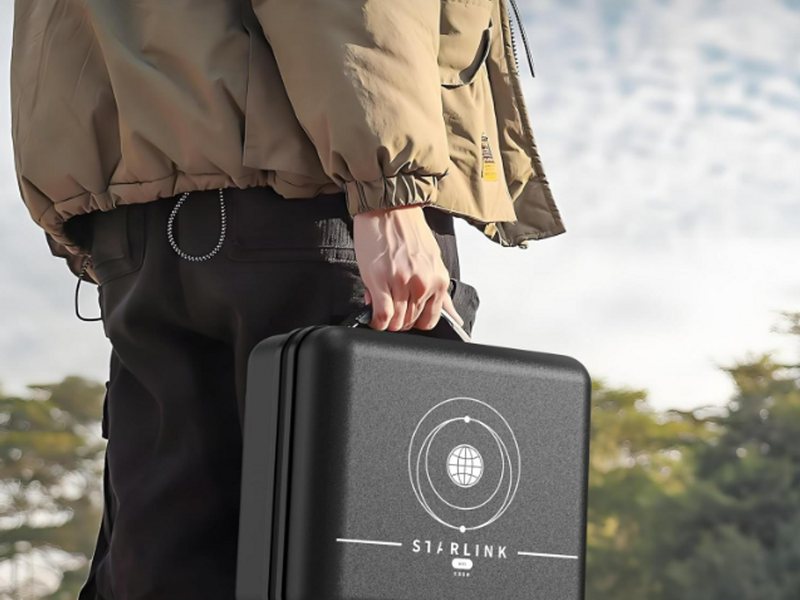
Starlink unveiled the Starlink Mini 2 on 10 November 2026. Its headline feature is a removable battery, so the dish can run for a few hours with no power lead at all. It also sw...
Read article
Starlink unveiled the Starlink Mini 2 on 10 November 2026. Its headline feature is a removable battery, so the dish can run for a few hours with no power lead at all. It also switches to USB-C power and gets Wi-Fi 6.
Naturally, plenty of Australian 4WD, caravan and camping customers are asking whether they should wait for it. In this guide we cover what's confirmed, what's still unknown, and how it stacks up against the original Starlink Mini, which is available in Australia now for around $299 on promotion and is supported by our full Starlink Mini accessories range.
We've labelled what's officially confirmed, what comes from unofficial firmware research, and what's our own expectation as a 12V and touring specialist.
71 Wh
Removable Battery
4.5 h
Quoted Battery Life
60 W
USB-C Power Input
1.6 kg
Weight With Battery
Specifications from Starlink's Starlink Mini 2 page and launch reporting (ISPreview). Australian specs and kit contents may differ.
| Specification | Original Starlink Mini | Starlink Mini 2 |
|---|---|---|
| Dimensions | 298.5 x 259 x 38.5 mm | 314 x 263 x 23.1 mm |
| Weight | 1.16 kg with kickstand | Approx. 1.6 kg with battery and kickstand |
| Battery | None | Removable 71 Wh |
| Battery life | Depends on your external power supply | Up to 4.5 hours (quoted) |
| Power input | 12 to 48 V DC barrel connector | USB-C, 60 W Power Delivery |
| Average power use | 25 to 40 W (official) | Not published |
| Wi-Fi | Wi-Fi 5 | Wi-Fi 6 |
| Weather rating | IP67 (under specified conditions) | IP67 (under specified conditions) |
| Mounting | Starlink Mini-specific fittings | Different mounting system, standard 1/4-20 camera thread |
| Australian availability | Available now | Not announced |
| Australian price | Approx. $299 on promotion | Not confirmed |
Original Starlink Mini figures from Starlink's Starlink Mini specification sheet. Promotional pricing changes, so check current offers.
The Starlink Mini 2 isn't dramatically smaller. It's about 15 mm thinner, but slightly larger across its face, and around half a kilo heavier with the battery fitted.
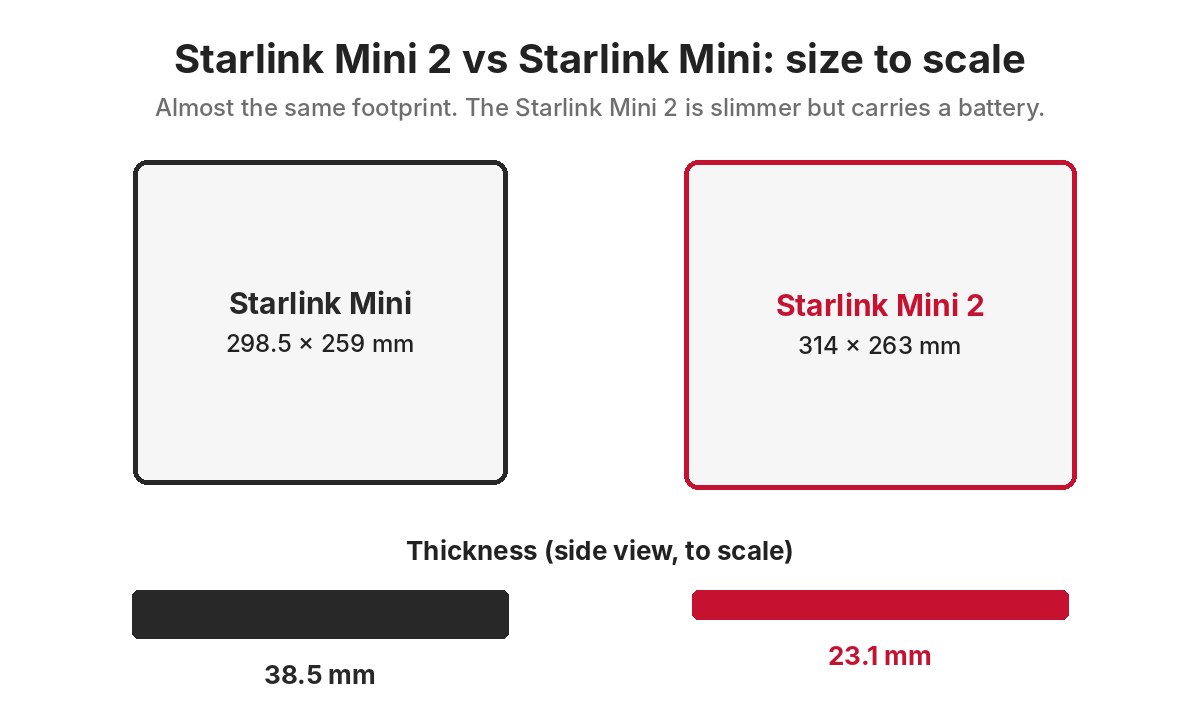
For most Australian 4WD and caravan owners, we don't think waiting makes sense. Here's why.
It isn't expected to be cheaper
The original Starlink Mini is around $299 on promotion. Australian Starlink Mini 2 pricing hasn't been announced, but we expect the new hardware to carry a premium over that, at least at first. If you're waiting because you expect the Starlink Mini 2 to be cheaper, we think that's highly unlikely.
Don't count on it for Christmas 2026
There's no Australian release date, and first US deliveries are reportedly not due until mid-December. Planning a Christmas camping trip or summer holiday? Don't count on the Starlink Mini 2 arriving in time. The original Starlink Mini is available now.
Your Starlink Mini mounts won't fit
The Starlink Mini 2 has a different shape, size, battery attachment and power connection. If you switch, budget for new mounting hardware, power leads and probably a new case.
The original Starlink Mini is proven
It's one of the most popular satellite internet products with Australian travellers, with an established track record and a large range of compatible accessories.
Newer isn't automatically better
The removable battery and Wi-Fi 6 will suit some people, but if your Starlink Mini runs from a vehicle or caravan 12V system, you may see little benefit. Upload performance and battery behaviour in high heat still need real-world testing.
Before launch, Starlink researcher Oleg Kutkov analysed firmware for the Starlink Mini 2 and shared his findings publicly. He reported that the dish's transmit duty cycle drops from about 75% on the original Starlink Mini to about 11% on the Starlink Mini 2 (reported by Notebookcheck).
The transmit duty cycle is the share of time the terminal is permitted to transmit, which is how your data gets up to the satellite. Transmitting less can cut power use, which would make sense for a dish designed to run from a small removable battery. Kutkov said the limit is most likely driven by the terminal's power budget, though Starlink hasn't confirmed this.
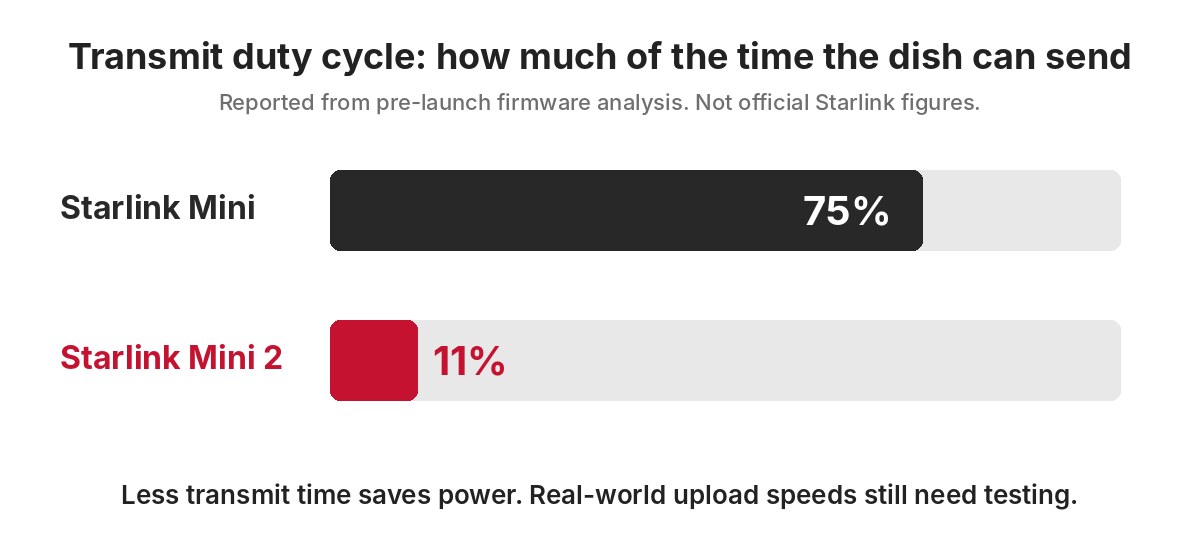
What this doesn't tell us is the actual upload speed. Duty cycle doesn't convert directly into throughput, and some analysis has estimated uploads around 10 Mbps, but that's an estimate, not a confirmed figure. Download performance also needs to be tested before anyone can say it matches the original Starlink Mini.
Many Australian travellers mount their Starlink Mini on a 4WD roof, roof rack, caravan or camper trailer roof, canopy or magnetic vehicle mount, often for days at a time. Summer air temperatures can top 40 °C in outback regions, and a roof sitting in direct sun gets much hotter than the air around it.
Like all lithium batteries, the Starlink Mini 2's battery will have its own limits for charging, discharging and storage temperatures, and those are separate from the outside air temperature. Starlink hasn't published an operating temperature range for the Starlink Mini 2 yet (the original Starlink Mini is rated from -30 °C to 50 °C). Pre-launch firmware research also reported a battery thermal shutdown threshold of 80 °C. That's a protection cut-off, not the temperature the battery is designed to charge at.
We're not suggesting there's anything wrong with it. Like any lithium battery product, it will be managed by a battery management system. But these are the practical questions we want answered once we can test one in Australian conditions:
The original Starlink Mini has no onboard battery. It runs from an auxiliary lithium battery, the vehicle's electrical system or a portable power station. That means your battery can live somewhere protected, such as the canopy, cabin or caravan battery box, while the dish sits outside on the roof.
It also means much more runtime. A typical 100 Ah 12V lithium auxiliary battery stores about 1,280 Wh, around 18 times the Starlink Mini 2's 71 Wh. With an average draw of 25 to 40 W, the original Starlink Mini can run for a long time from a setup most tourers already have. Our plug and play portable lithium battery guide shows one simple way to set that up. A built-in battery matters a lot if you're carrying the dish on a hike, but much less in a 4WD or caravan with an established 12V system.
Here's the timeline so far:
Given that timeline, widespread availability through Australian retailers before Christmas 2026 looks unlikely. We wouldn't plan a summer trip around it. We'll update this article as soon as Starlink confirms Australian details.
Starlink hasn't announced an Australian retail price. In the US, the introductory pre-order offer is US$999, which includes the Starlink Mini 2 hardware, one removable battery and 12 months of Roam Unlimited service (Notebookcheck). That's a hardware and service bundle, not the price of the dish on its own, so it can't simply be converted into an Australian hardware price. There have also been reports of a lower US hardware-only figure found in Starlink's website code, which Starlink hasn't confirmed.
Our expectation, not an official price: the Starlink Mini 2 will carry a premium over the original Starlink Mini's current promotional price of around $299, at least at launch. If you're holding off because you expect the new model to be cheaper, we think that's highly unlikely.
No. Model-specific Starlink Mini mounts are designed around the original dish's shape, size and fittings. The Starlink Mini 2 has different dimensions, a different mounting arrangement and a battery on the back, so those mounts won't fit. The same goes for cases shaped for the original dish, and barrel-connector power leads won't plug into the Starlink Mini 2's USB-C input.
Some universal mounting gear may be adaptable, because the Starlink Mini 2 has a standard 1/4-20 camera thread, but check each product individually. If you're thinking about switching, budget for new mounting hardware, power connections and possibly a new case.
We're already researching and developing Starlink Mini 2 accessories, including USB-C power supplies and cables, mounting brackets and cases. We'll only list them as compatible once we've tested them on the real dish.
Meanwhile, here's how our customers run the original Starlink Mini today:
The original Starlink Mini accepts 12 to 48 V DC, but it doesn't like low voltage. As a 12V battery drops under load, or voltage is lost along a long or thin cable, the dish can drop out or reboot. A regulated 12V to 30V booster gives it a steady supply in compatible installations. That's why we make the 12V to 30V booster with Anderson plug and the 12V to 30V booster with cigarette plug, plus DC power cables and Anderson style power leads.
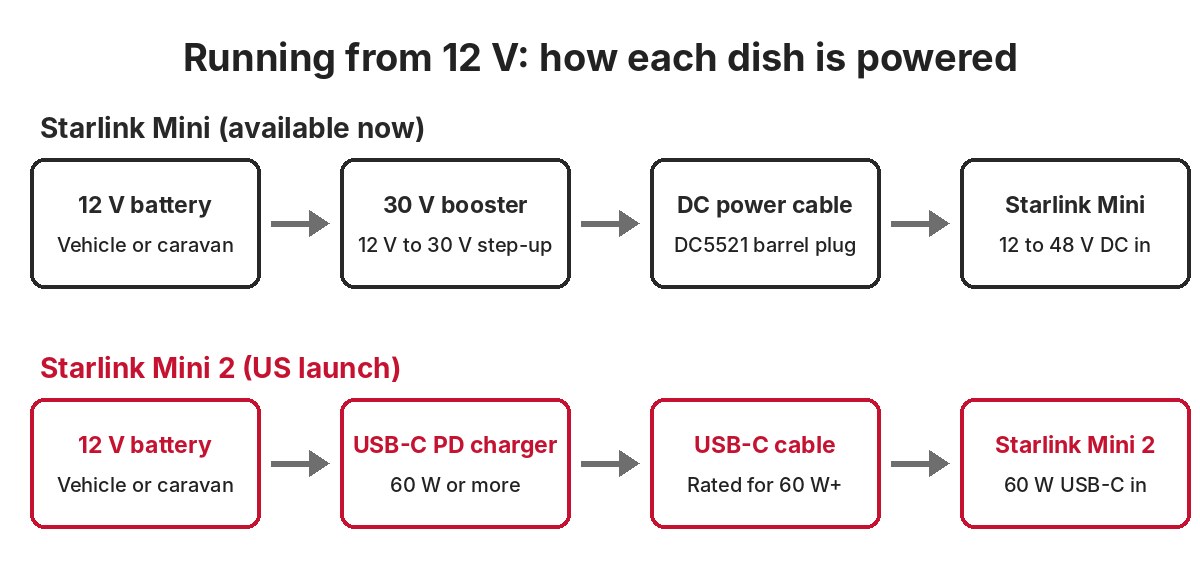
The Starlink Mini 2 changes to USB-C Power Delivery, so it needs a different solution: a USB-C PD power supply and cable rated for at least 60 W. Don't assume existing Starlink Mini power accessories will work. We're testing USB-C power cables and converters for the Starlink Mini 2 now and will publish compatibility once confirmed.
If you specifically need a completely self-contained portable setup, for example for hiking or quick stops away from the vehicle, the Starlink Mini 2 may be worth waiting for once Australian details and real-world testing are in.
If you need internet for a 4WD, caravan, camper trailer, remote work setup or a trip this summer, there are very good reasons to choose the original Starlink Mini now.
Starlink hasn't announced an Australian release date. Pre-orders opened by invitation in the United States on 10 November 2026, with first US shipments reported for mid-December. We don't expect it to be widely available through Australian retailers before Christmas 2026.
There's no Australian price yet. In the US it launched as a US$999 pre-order bundle that includes the dish, one battery and 12 months of Roam Unlimited service, so that figure isn't the hardware price on its own. Our expectation is that the new hardware will cost more than the original Starlink Mini, which is currently around $299 on promotion.
Starlink quotes up to 4.5 hours from the removable 71 Wh battery. Real-world runtime will depend on conditions and use, and the dish can also run from USB-C power.
It hasn't been tested independently yet. Pre-launch firmware research reported the transmit duty cycle dropping from about 75% to about 11%, which suggests lower upload capacity, but duty cycle doesn't convert directly into a speed figure. Independent testing is needed.
Model-specific Starlink Mini mounts and cases won't fit, because the Starlink Mini 2 has a different size, a battery on the back and a different mounting arrangement. Barrel-plug power leads won't plug into its USB-C input either. Some universal mounts may be adaptable using its standard 1/4-20 camera thread, but check each one.
It's designed to take USB-C Power Delivery at 60 W, so a quality 12V USB-C PD supply rated for at least 60 W is the likely approach. We're testing suitable cables and power supplies now and won't list anything as compatible until it's been tested.
Questions about powering or mounting your Starlink Mini? Contact our team.
Last updated 12 November 2026. Starlink Mini 2 details come from Starlink's announcement and published reporting, and may change before an Australian release. Firmware findings are unofficial. Prices and availability are current at the time of writing.
An air fryer at camp means crispy chips, hot sausage rolls and reheated leftovers without lighting the stove. Household air fryers use a lot of power, though, so it pays to know w...
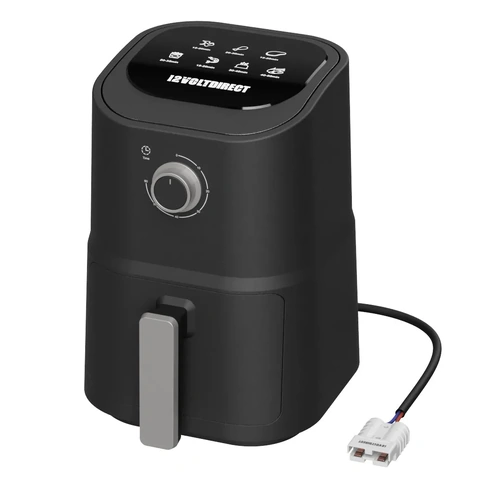
Read articleAn air fryer at camp means crispy chips, hot sausage rolls and reheated leftovers without lighting the stove. Household air fryers use a lot of power, though, so it pays to know what a 12V model can do and what your battery system needs before you buy.
The short answer: a true 12V air fryer runs straight from your battery through an Anderson-style plug, with no inverter. Ours runs at 250W (about 22A), reaches 200°C and cooks frozen sausage rolls in about 15 minutes, using roughly 5.5Ah of battery.
| Option | Power draw at 12V | Speed | Needs | Best for |
|---|---|---|---|---|
| 12V air fryer | About 22A (250W) | Sausage rolls in 15 min, nuggets 20 min | Anderson-style socket, 12V battery | Crispy food at camp without gas |
| 240V air fryer on an inverter | Often 120A or more (up to 1500W) | Faster | Large pure sine inverter and battery bank | Rigs with a big inverter and lots of battery |
| 12V oven (e.g. Road Chef) | About 8.3A (100W) | Slower, can cook while you drive | Anderson, cigarette or Merit socket | Pies, roasts and meals ready when you arrive |
| Gas cooker or camp oven | None | Varies | Gas or fire | Cooking when power is short; check fire bans |
240V figures are typical for household air fryers and vary by model.
These are average cooking times for our 12V air fryer. Battery use assumes the fryer draws about 22A for the whole cook, so real use is often a little lower.
| Food | From frozen | Defrosted | Battery used (frozen) |
|---|---|---|---|
| Sausage rolls | 15 min | 10 min | About 5.5Ah |
| Chicken nuggets | 20 min | 12 min | About 7Ah |
| Meat pies | 35 min | 25 min | About 13Ah |
| Spinach and ricotta rolls | 35 min | 25 min | About 13Ah |
| Potato chips | 55 min | 40 min | About 20Ah |
Results vary with the amount of food. Defrosting food in the fridge first saves both time and battery.
Need more reach? A 2m Anderson extension lead lets you cook away from the vehicle. If you are not sure your setup will run it, ask our team and we will check it with you.
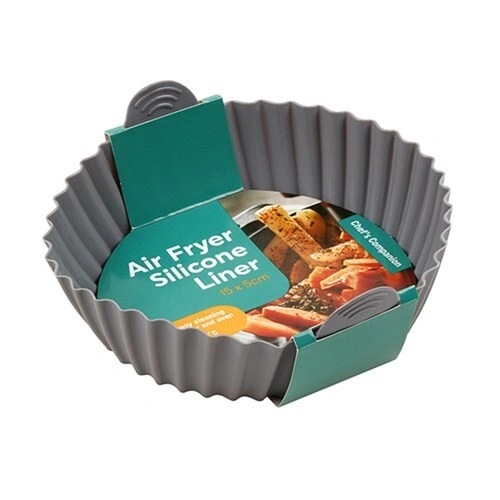
A silicone liner sized for the basket catches grease and crumbs, so clean-up at camp is a quick rinse rather than a scrub with limited water.
No. Our air fryer draws about 22A, and cigarette and Merit sockets are usually wired for a maximum of 10A. Use an Anderson-style socket with adequately sized cable, and do not use an adapter.
About 5.5Ah for 15 minutes of cooking (22A x a quarter of an hour). A batch of frozen sausage rolls uses around 5.5Ah, and chips cooked from frozen around 20Ah.
It reaches up to 200°C, similar to a household air fryer, but at 250W it takes longer to cook than a 1500W mains unit. See the cooking times above.
Not for a 12V air fryer. Running a 240V air fryer through an inverter is possible, but it needs a large inverter and draws well over 100A from a 12V battery.
Our 12V air fryer has a 2L non-stick basket (tray 155 x 155 x 100mm). It suits one to two people.
An air fryer crisps food faster. A 12V oven like the Road Chef draws less current and can cook while you drive.
Good coffee is one of the first things people miss when they head bush. You can get a proper espresso-style coffee at camp without gas, a kettle or a generator, but there are a fe...
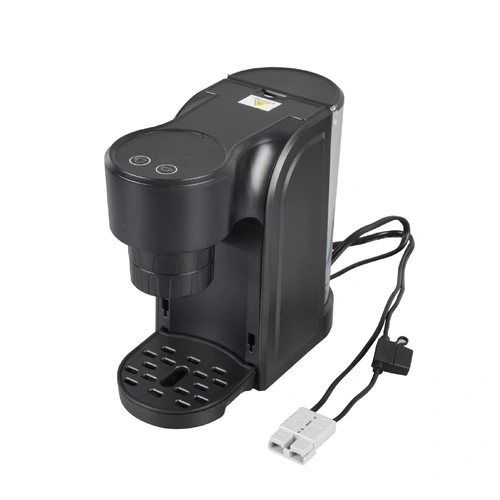
Read articleGood coffee is one of the first things people miss when they head bush. You can get a proper espresso-style coffee at camp without gas, a kettle or a generator, but there are a few ways to do it and they suit different setups. This guide explains your options, how much battery each one uses and how to wire a 12V machine safely.
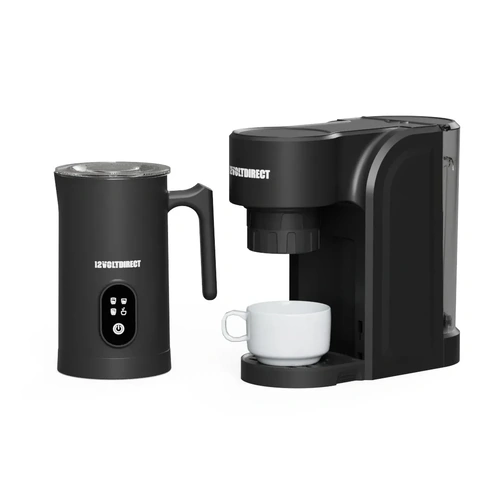
The short answer: if you have a lithium or AGM battery with an Anderson-style socket, a true 12V coffee machine is the simplest option. Ours heats cold water itself in about 2 minutes and uses about 0.8Ah per large coffee, so a 100Ah battery makes more than 100 coffees per charge. No inverter, gas or kettle needed.
| Option | What you need | Time to a coffee | Battery or fuel use | Best for |
|---|---|---|---|---|
| True 12V pod machine | 12V battery, 50A Anderson-style socket | About 2 minutes | About 0.8Ah per large cup | Caravans, canopies, campers and utes with a battery system |
| 240V machine on an inverter | Pure sine inverter (usually 1500W or more), heavy cabling, large battery | 1 to 3 minutes once warm | Heats at over 1000W, roughly 100A or more from a 12V battery while heating | Big rigs that already run a large inverter |
| Stovetop or percolator | Gas stove and gas bottle | 5 to 10 minutes | Gas | Tent camping with no battery system |
| Hand-press espresso maker | Hot water from a kettle or stove | 5 minutes or more | Gas or power to boil the water | Hiking and very light setups |
Inverter figures are typical for household machines and vary by model. Check the wattage on your own machine.
Most of the energy goes into heating the water. Our 12V coffee pod machine heats at around 27A for about two minutes, then the draw stops. That works out to:
| Coffees | Battery used (approx.) | Share of a 100Ah battery |
|---|---|---|
| 1 large coffee | 0.8Ah | Under 1% |
| 2 coffees a day for a week | 11Ah | About 11% |
| 4 coffees a day for a week | 22Ah | About 22% |
Add a milk frother and allow about 1Ah more per drink (180W for around 4 minutes). Solar or a DC-DC charger will easily put that back during the day.
A 12V coffee machine draws more current than a cigarette socket can safely carry. Before you buy, check your setup has:
Running two appliances? An Anderson Y splitter lets the coffee machine and frother share one socket. If you are not sure your system can run it, ask our team and we will check it with you.
Our machine comes with two adapters, so you can choose each morning:
The 550ml water tank makes small (40-60ml) or large (90-110ml) cups. A mounting bracket is included for canopies, caravans and utes.
*Nespresso is a registered trademark of Société des Produits Nestlé S.A. This product is not associated with or endorsed by Nespresso.
For milk coffees, our 12V milk frother heats and froths up to 130ml of milk in about 4 minutes, or heats up to 430ml for hot chocolate. It runs at 180W from the same Anderson-style socket and switches itself off when done.
Not ours. It draws around 27A while heating (up to 34A at peak), and cigarette and Merit sockets are usually wired for about 10A. Plug it into a 50A Anderson-style socket wired with 12AWG (4mm²) cable and a 40A fuse.
A large coffee uses about 0.8Ah, so a 100Ah battery can make more than 100 coffees per charge. Most people use a small fraction of their battery each morning.
No. A true 12V machine runs straight from the battery. A household 240V machine does need an inverter, and a big one, because it heats at over 1000W.
Nespresso-compatible pods and capsules. A second adapter in the box lets you use your own ground coffee instead.
About 2 minutes from cold water. It heats the water itself, up to 95°C, so there is no kettle or stove involved.
Yes, with our 12V milk frother. It heats and froths milk in about 4 minutes and runs from the same Anderson-style socket. The Barista Bundle has both.
Mount it securely with the bracket supplied, but make your coffee with the vehicle parked. Hot water and a moving vehicle do not mix.
Want 12V power for a fridge, a Starlink Mini or lights at camp, but don’t want to wire a dual battery system into your car? You don’t have to. A portable lithium battery plus a ...
Read article
Want 12V power for a fridge, a Starlink Mini or lights at camp, but don’t want to wire a dual battery system into your car? You don’t have to. A portable lithium battery plus a charger that plugs into your car’s 12V socket does the job, with nothing to install.
Here’s how our 50Ah slimline portable lithium battery and our 5 amp plug & play DC to DC charger work together, how long charging really takes, and how to get the most out of them on a trip.
50Ah
12.8V LiFePO4
7.3 kg
Battery weight
5A
Charge from the car
0
Wires to install
A fixed dual battery system is great if you’re on the road every weekend, but it means a battery tray, cable runs, fuses and usually an installer. If you camp a few times a year, drive a work ute during the week or swap between cars, that’s a lot of cost for something you use now and then.
With a portable setup, the battery lives in the car when you need it and in the garage when you don’t. The charger plugs into the 12V socket you already have, so there’s no drilling, no wiring and nothing for an auto electrician to do. Move it to the next car, the boat or the caravan and it works the same way.
A 20A or 40A DC to DC charger charges faster, but it has to be wired in. That means running heavy cable, usually 8 B&S, from the start battery under the bonnet through to the back of the car, with fuses at each end. It’s a proper install job.
Our 5A charger draws so little that a standard 12V power point can run it. If your car already has a socket in the centre console or in the cargo area, plug it in and you’re done. No new cable from the start battery, nothing under the bonnet.
We chose 5 amps on purpose. We tested a 10A plug-in DC to DC charger too. In our testing, 10 amps is about the absolute maximum a car’s cigarette lighter socket is rated for, and the factory wiring behind it is usually quite thin.
Anything much above our 5A charger was unreliable unless you added extra wiring beyond the factory spec, and that defeats the point of plug and play. At 5A the charger sits comfortably inside what the socket and its wiring were built for, so there’s no risk of popping fuses or damaging wiring.

The battery
At 330 x 210 x 70 mm and 7.3 kg, it slides behind a seat or beside the fridge and carries by the handle. Everything you need is built into the front panel.

The charger
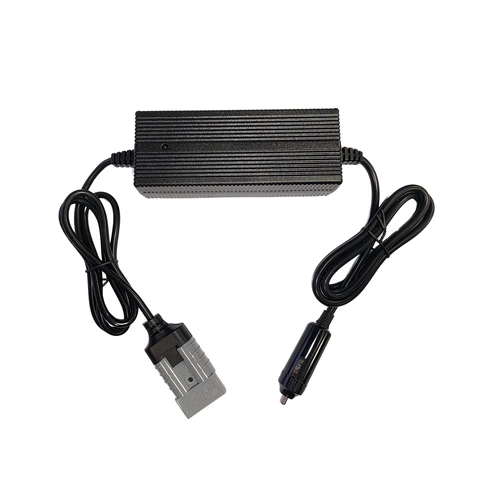
One end plugs into your car’s 12V cigarette socket, the other into the battery’s Anderson socket. That’s the whole install.
A lithium battery needs 14.6V to charge fully, which is more than a car socket gives you, especially with a modern smart alternator. The charger lifts the voltage to 14.6V with a proper LiFePO4 charge profile, so the battery actually charges instead of just sitting connected.
This is the question we get asked most. At 5 amps, a completely flat 50Ah battery takes roughly 10 to 12 hours of driving to fill. That sounds like a lot, and it would be if you relied on the car to do all the charging.
That’s not how this setup is meant to work. The DC to DC charger is a top-up charger. Start the trip with the battery full, and the charger puts power back in every time you drive, so you’re never starting from empty.
Rule of thumb: every hour of driving puts back about 5Ah, or around 10% of the battery.
| Time driving | Charge put back (approx.) | Share of the 50Ah battery |
|---|---|---|
| 1 hour | about 5Ah | about 10% |
| 2 hours | about 10Ah | about 20% |
| 4 hours | about 20Ah | about 40% |
| 10 hours or more | about 50Ah | flat to full |
Figures are a guide only. If you’re running the fridge off the battery while you drive, some of that charge goes straight to the fridge.
Charge it fully at home before you leave
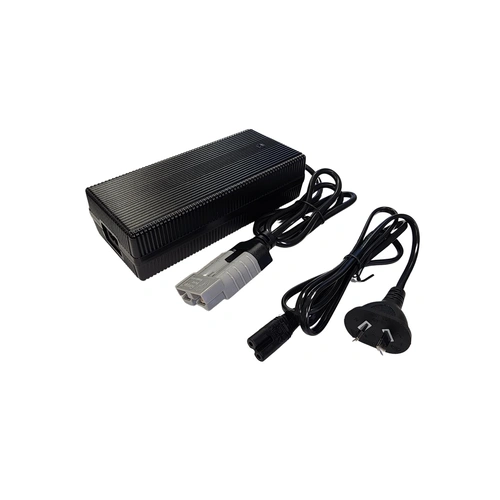
Use a mains lithium charger the night before. Our 10A LiFePO4 charger fills the battery from flat in around 5 to 6 hours, or the 5A version overnight. Both plug straight into the Anderson socket.
Plug in the DC to DC charger whenever you drive
Battery in the car, charger in the 12V socket, Anderson into the battery. Every leg of the trip tops it back up.
Run your gear at camp
Plug the fridge, Starlink or lights into the battery’s 12V sockets, USB or Anderson outputs.
Put a solar panel out at camp
While the car is off, set up a portable solar panel or blanket and plug it into the battery’s Anderson socket through a solar regulator. It charges the battery back up during the day while the fridge keeps running.
Drive to the next spot and repeat
Between a full start, a top-up on every drive and solar at camp, the battery stays charged for a weekend away instead of running down.
Tried in our own truck
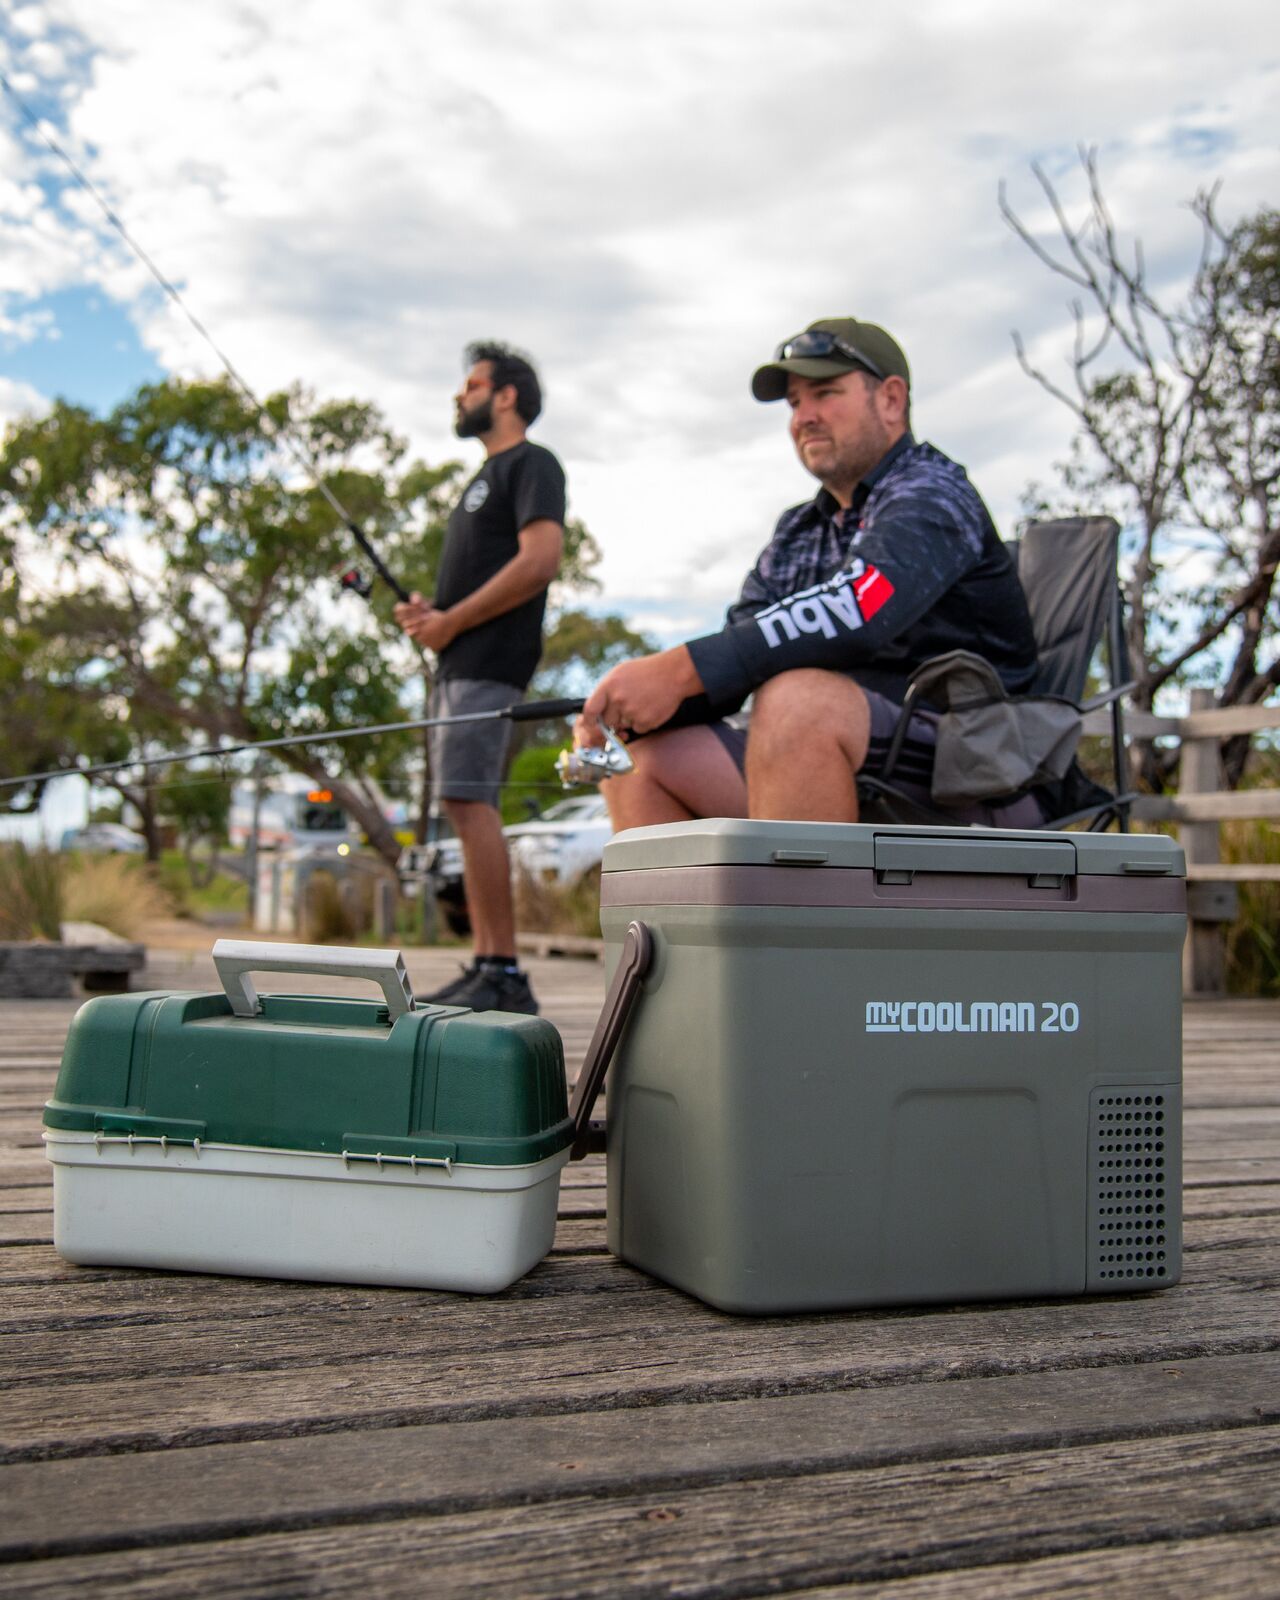
We run this exact setup in our own truck: the 50Ah battery, the 5A plug & play charger and the myCOOLMAN 20 litre compressor fridge. The charger tops the battery up while we drive, and when the car is turned off the fridge keeps running off the battery. No extra cabling to the fridge.
The myCOOLMAN 20 is rated at just 0.8Ah per hour (tested at 12V, set to 5°C in 32°C heat), so it suits a 50Ah battery well. In our experience, starting with a full battery and driving long distances each day, the battery runs this fridge for 2 to 3 days.
That depends on what you plug in, how hot it is and how much you drive. As a rough guide:
Running a fridge and a Starlink together for days without driving? That’s when it’s worth adding solar or stepping up to a bigger battery. Ask us and we’ll help you size it.
See more in DC to DC chargers and slimline lithium batteries.
Tell us what you want to run and how you travel, and we’ll help you work out if this setup suits. Send us a message.
Designed by 12 Volt Direct
Portable power that charges as you drive. Nothing to install.
A rooftop tent lid is prime real estate for solar. It’s up high, out of the shade and facing the sky every time you park. The trouble is most 200W panels are long and narrow, so...
Read article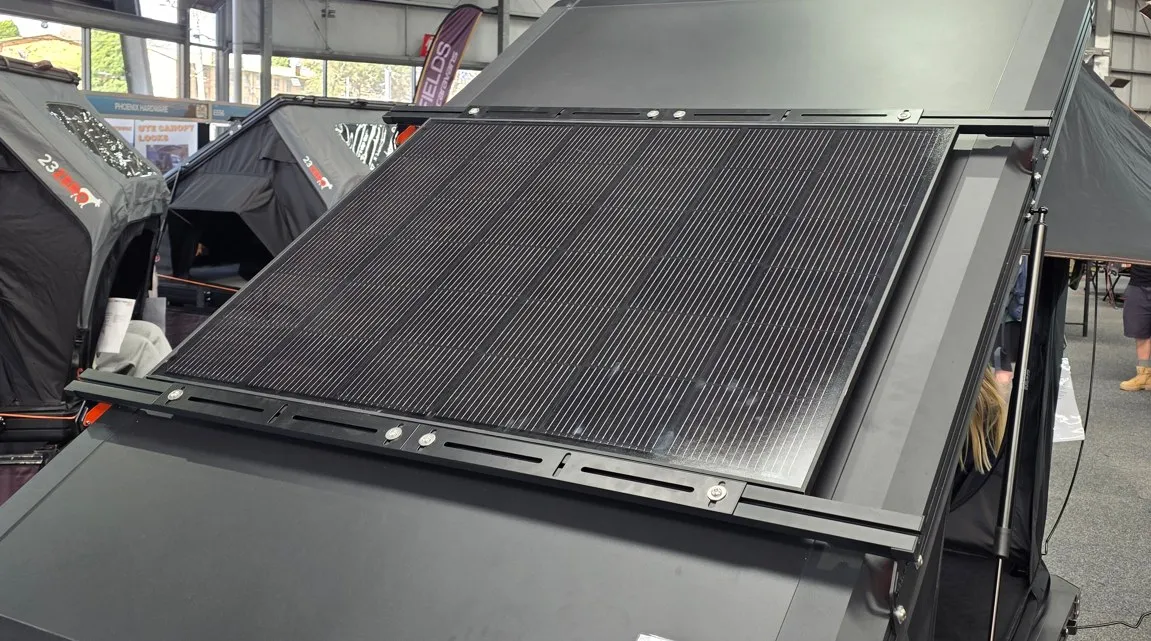
A rooftop tent lid is prime real estate for solar. It’s up high, out of the shade and facing the sky every time you park. The trouble is most 200W panels are long and narrow, so they hang over the edge of the lid or fight with the tent’s own rails.
So we made one that fits. Our 200W low-profile panel is a squarer 1145 x 870 mm, only 17 mm thick, and it pairs with our low-profile brackets for a fit that looks like it came with the tent.
200W
Rated power
1145 x 870
Size in mm
17 mm
Frame thickness
7.98 kg
Panel weight
Most hard shell rooftop tents have a lid somewhere around the size of a roof rack, wider than a typical 200W panel and a lot shorter. A long, skinny panel either sticks out past the lid or forces you to drop down to a smaller, weaker panel.
At 1145 x 870 mm, our panel uses the shape of the lid instead of fighting it. You get the full 200W in a footprint that sits inside the lid’s edges, so the tent still opens, closes and locks the way it should.
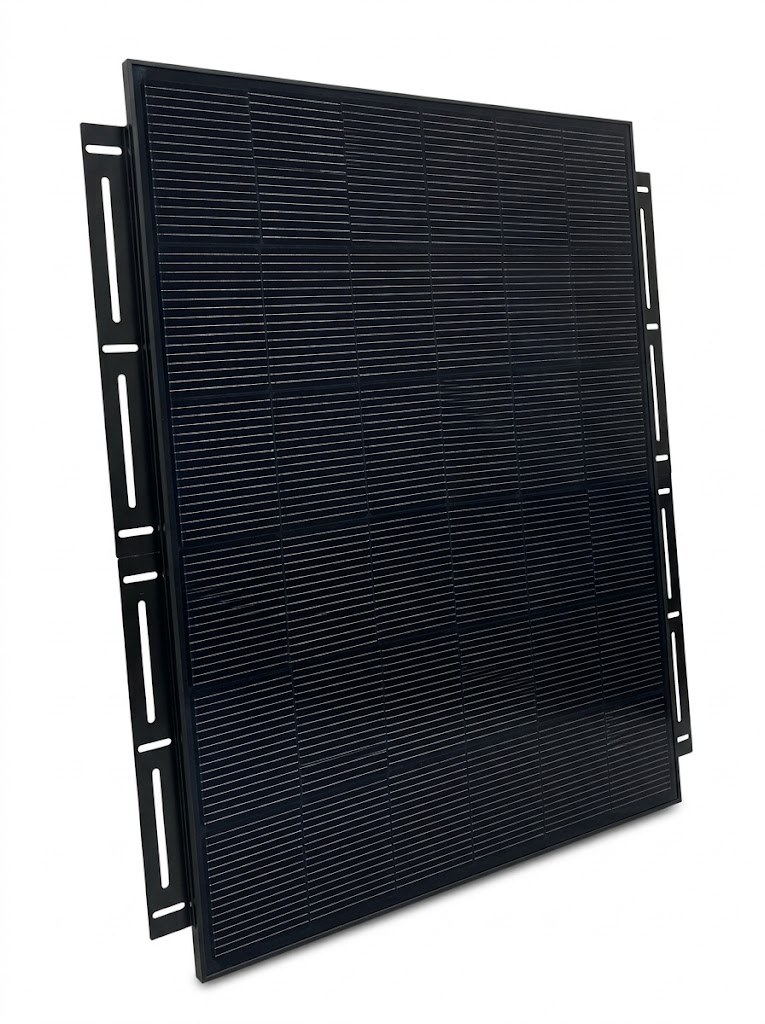
17 mm, all black
Most framed solar panels are 25 to 35 mm thick. Ours is 17 mm, with black cells, a black frame and a black backsheet. On a black tent lid or rack it almost disappears, and there’s less panel edge sitting up in the wind.
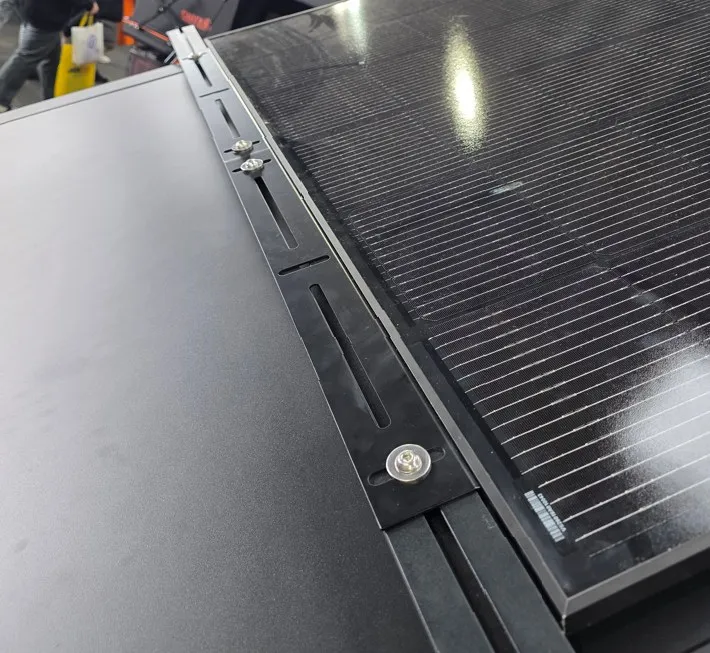
Brackets
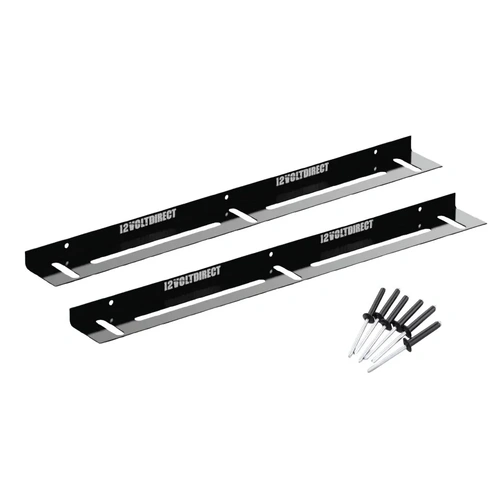
Our low-profile mounting brackets are laser-cut, folded aluminium in black, 500 mm long with a 20 mm lip. The panel frame comes pre-drilled for them, so they pop-rivet straight on with the black rivets in the pack. No drilling the panel, and no chunky Z-brackets lifting it up.
The brackets are sold in pairs and are optional, so you only buy them if they suit your setup. The 1145 mm panel takes two pairs (4 brackets).
The same brackets work two ways, depending on whether your tent has roof rails or you’re mounting to a rack platform.
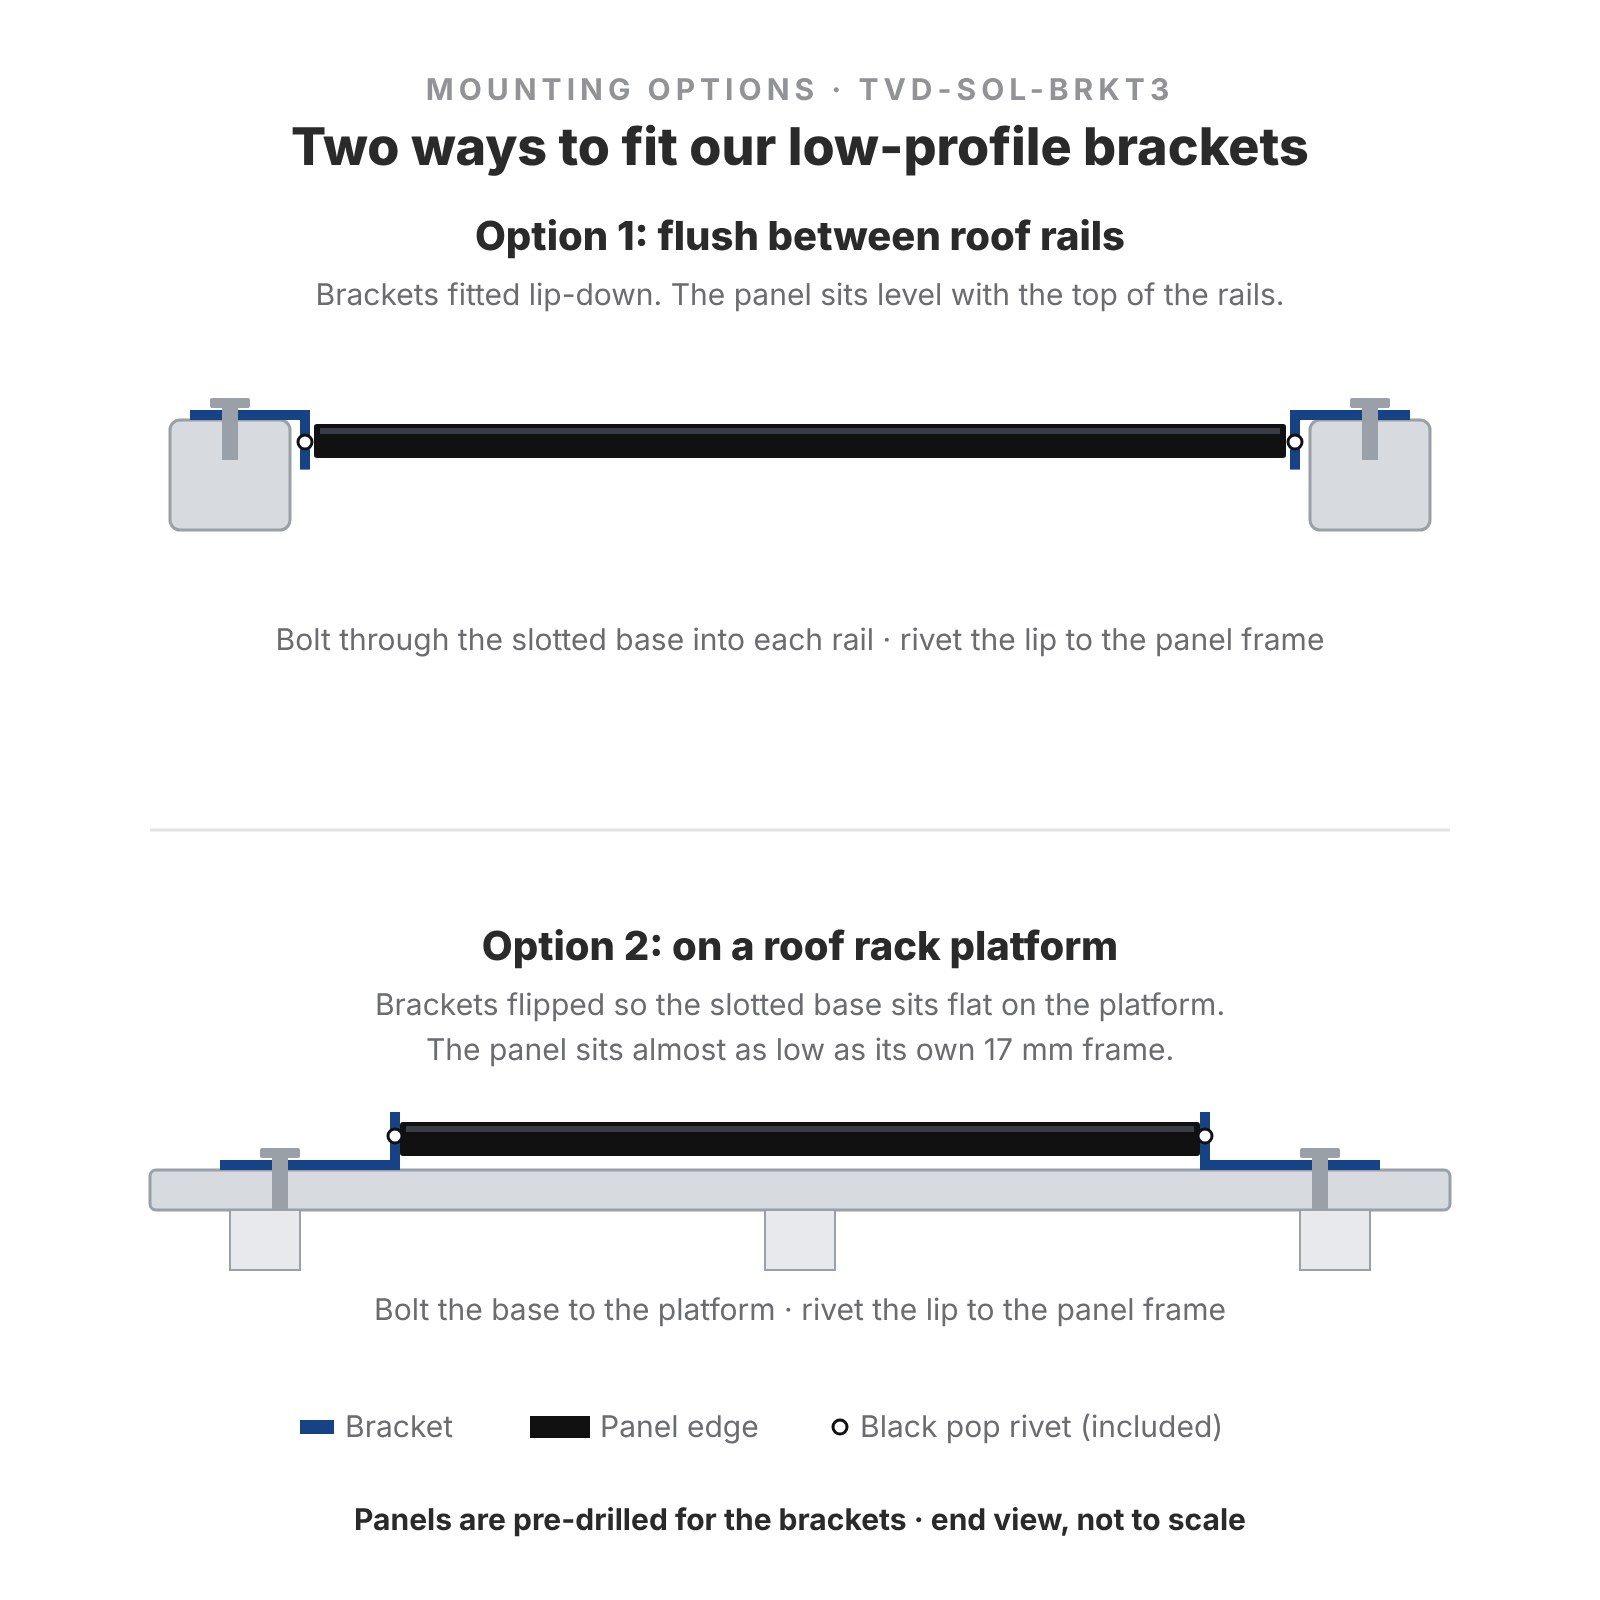
If you already have a way to mount it, grab the panel on its own. If you want everything in one order, the 1145 mm panel kit adds two pairs of brackets to the panel, and you can change the bracket quantity before you add it to the cart.
| Panel | Size | Best for | Brackets needed |
|---|---|---|---|
| 200W 1145 mm | 1145 x 870 x 17 mm | Rooftop tent lids and shorter racks | 2 pairs (4 brackets) |
| 200W 1480 mm | 1480 x 680 x 17 mm | Longer, narrower roof racks | 2 pairs (4 brackets) |
| 130W 1000 mm | 1000 x 670 x 17 mm | Smaller roofs, canopies and trailers | 1 pair (2 brackets) |
All three are the same 17 mm all-black design and take the same brackets.
See more fixed panels in Fixed Solar Panels.
Tell us which rooftop tent or rack you have and we’ll help you check the panel and brackets suit before you order. Send us a message.
Designed by 12 Volt Direct
200W of solar that fits your rooftop tent.
There’s nothing worse than an awning that flaps all night. The wind picks up, the fabric snaps, the arms rattle and nobody gets any sleep. The new Supex awning tie down range is...
Read article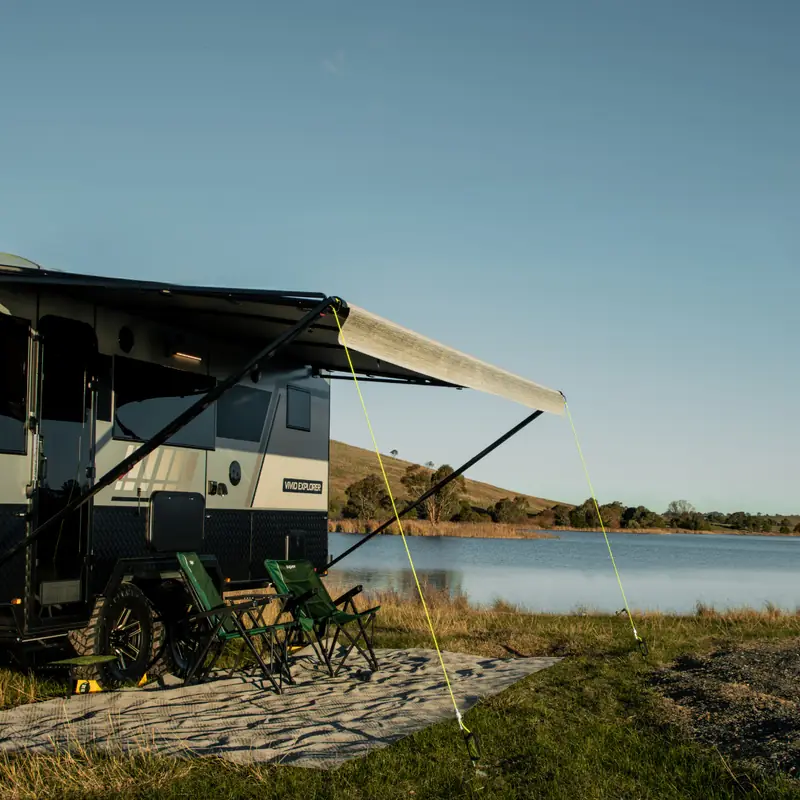
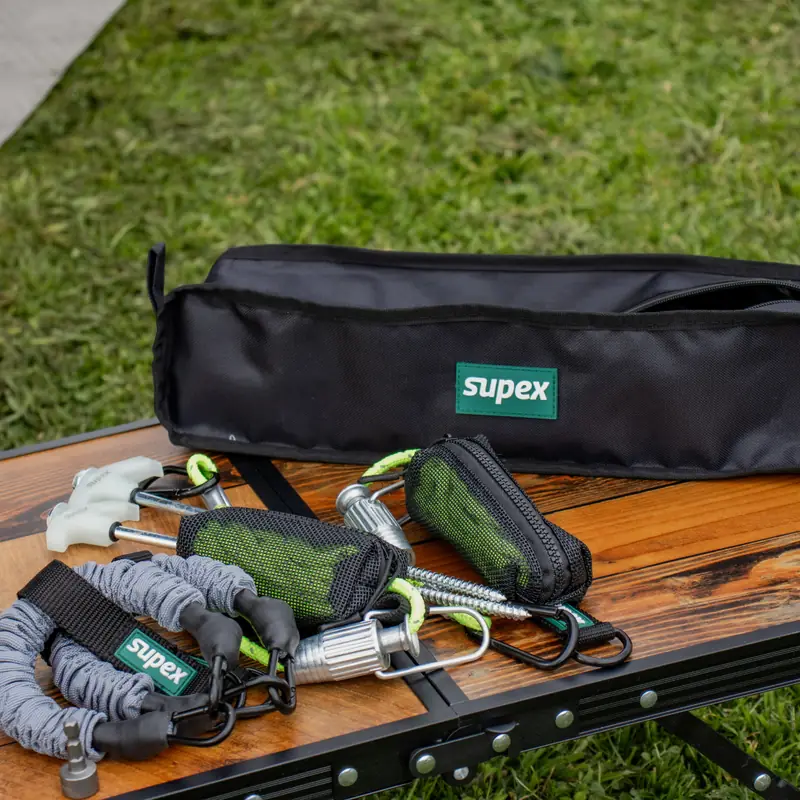
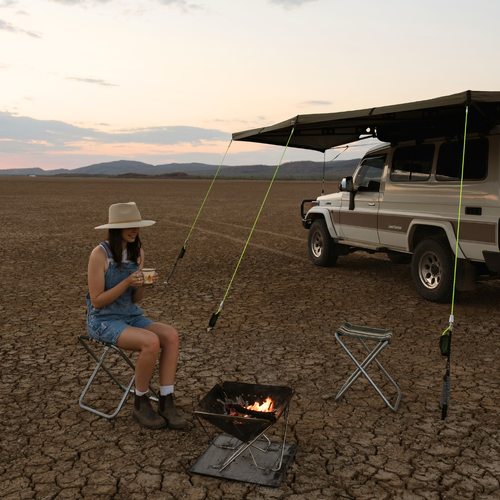
There’s nothing worse than an awning that flaps all night. The wind picks up, the fabric snaps, the arms rattle and nobody gets any sleep. The new Supex awning tie down range is now at 12 Volt Direct, and it’s built to keep your setup steadier at camp.
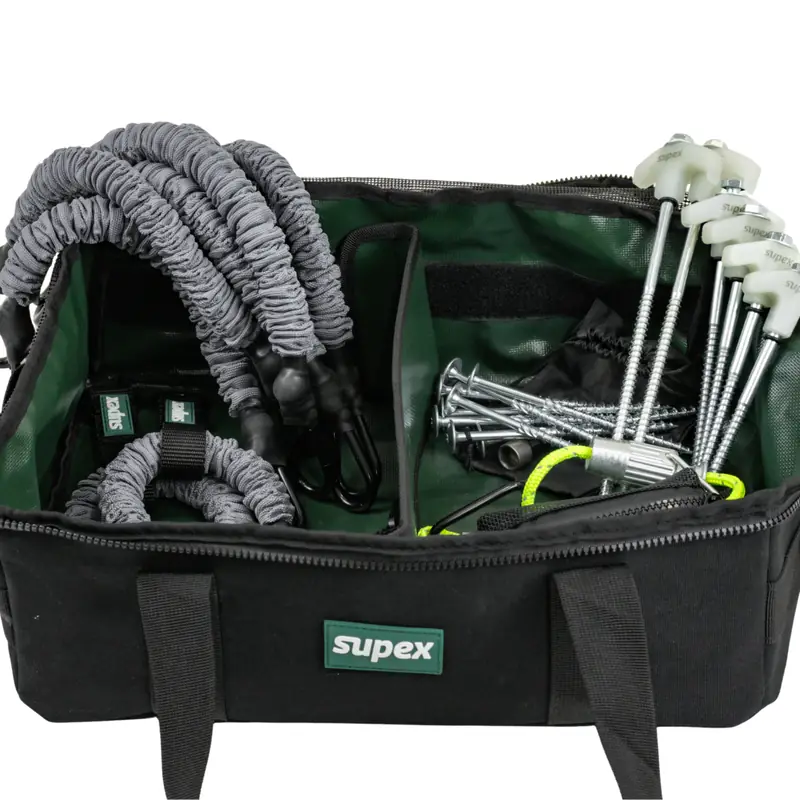
You can grab a complete kit with everything in one bag, or pick up just the parts you need. Here’s how it all fits together.
Tying down your awning cuts down on movement and wind flap. Less flap means less wear on the fabric and the arms, and a much quieter night. It also stops the awning lifting in a sudden gust while you’re sitting under it.
One thing to keep in mind: tie downs help, but they don’t make an awning safe to leave up in every kind of weather. If strong wind is on the way, roll it in.
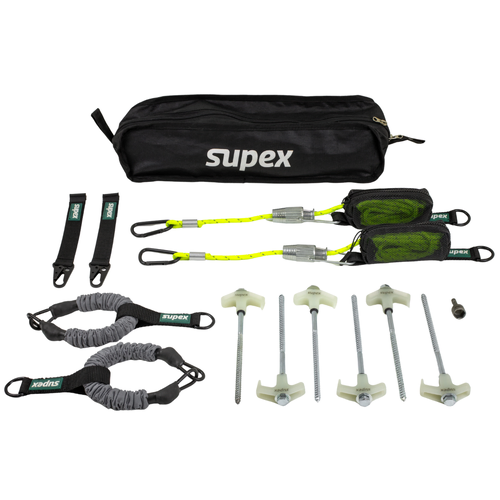
Every Supex tie down setup has the same three parts: something to connect to the awning, a line to take the load, and a peg to anchor it to the ground.
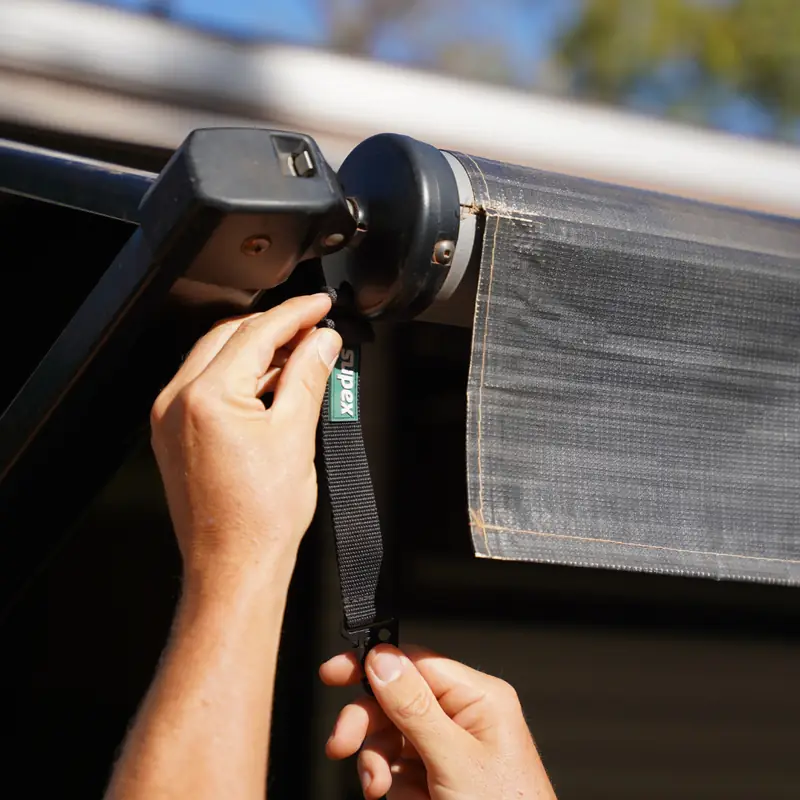
Step 1: Connect
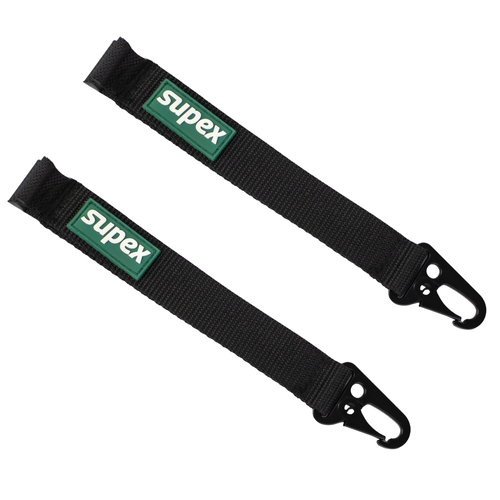
Sail track loops slide into the awning’s sail track and give you a strong webbing loop with a metal carabiner. Each loop has 5mm and 7mm splines, so it suits many caravan and 4WD awnings.
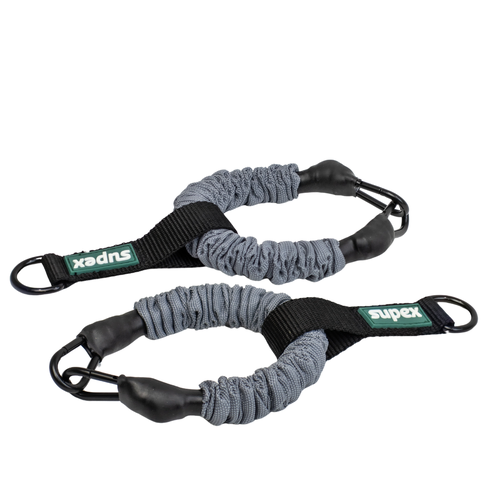
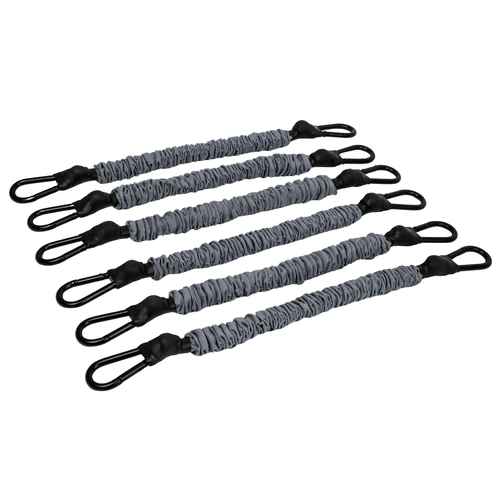
No sail track? Barrel bungees wrap around the awning barrel instead. Their soft cover helps avoid marks, and the stretch acts like a shock absorber when the wind gusts.
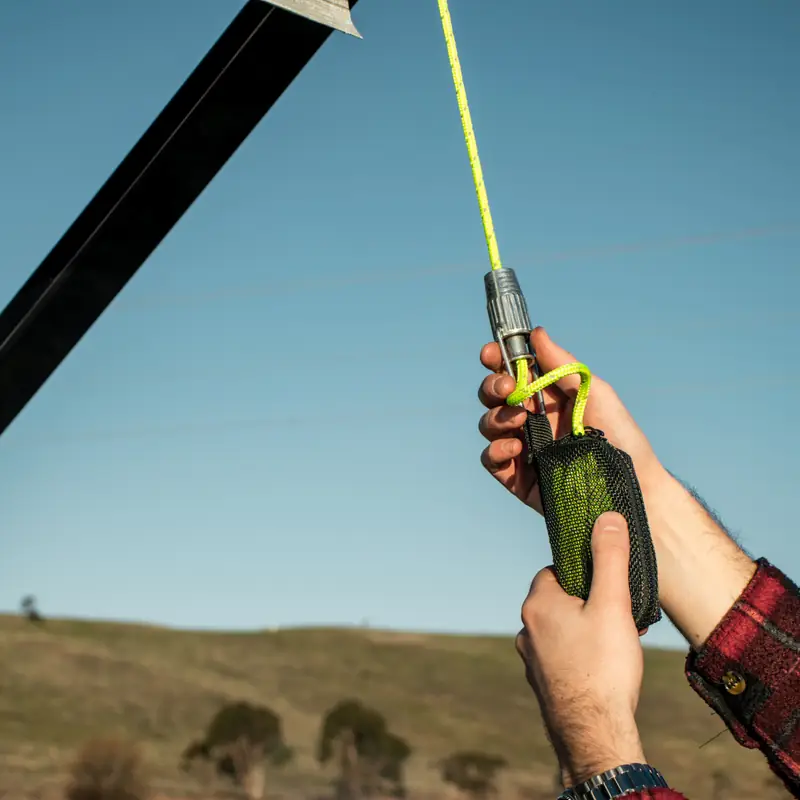
Step 2: Tension
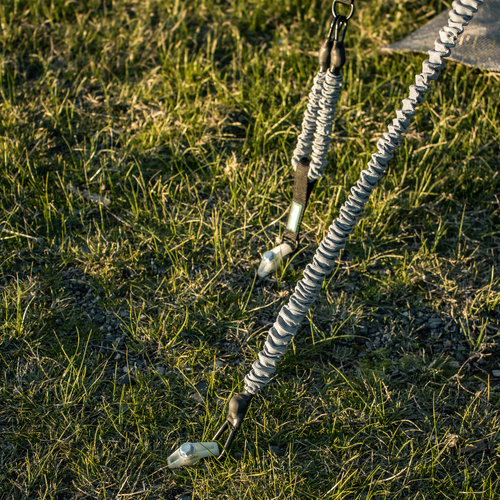
The reflective guy ropes clip on with a heavy duty carabiner and run down to a peg. Each one is 3.2m long and 6mm thick, and they light up when your torch or headlights catch them, so there are fewer trips over the lines at night.
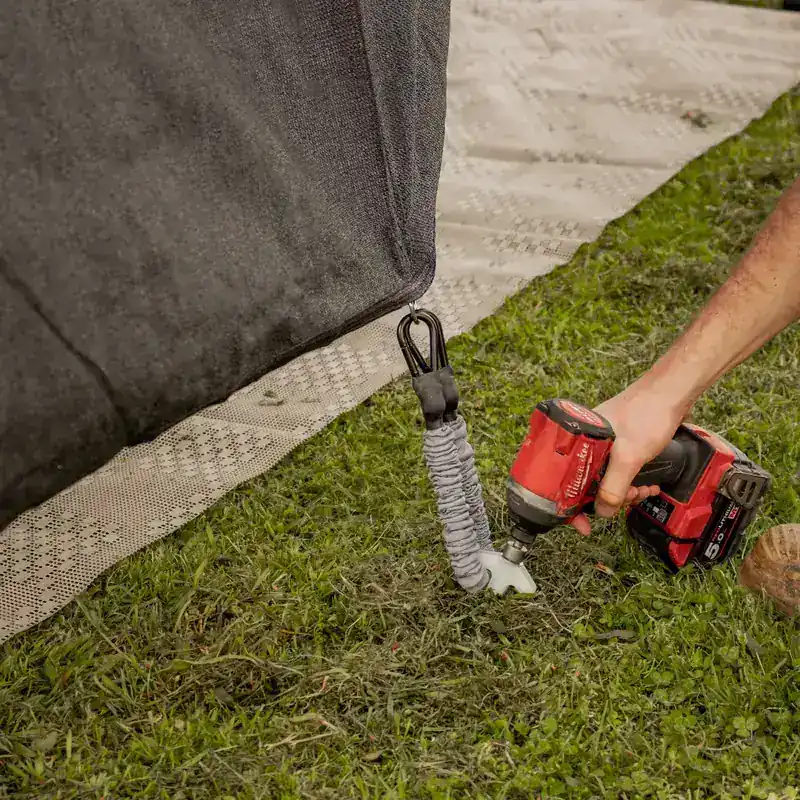
Step 3: Anchor
Supex screw-in pegs are made for hard ground. With the 13mm drill adapter and a cordless drill, they go in fast and come out just as easy when it’s time to pack up. The heads glow in the dark, so you can find them after sunset.
The easiest way to start is with a kit. Both come packed in a tough canvas bag, so everything stays together between trips.
| Essential (14 pieces) | Ultimate (30 pieces) | |
|---|---|---|
| Reflective guy ropes | 2 | 2 |
| Sail track loops with carabiners | 2 | 2 |
| 30cm barrel bungees | 2 | 2 |
| Hard ground screw-in pegs | 6 x 205mm | 2 x 300mm + 4 x 205mm |
| Screw-in mat pegs | – | 8, with a T40 bit |
| 35cm privacy screen bungees | – | 6 |
| 13mm drill adapter | Yes | Yes |
| Bag | Heavy-duty canvas bag | 400GSM PVC-lined canvas gear bag, 40 x 30 x 14cm |
| Best for | Holding down the awning | The whole campsite: awning, privacy screen and floor mat |
Both kits suit caravan awnings, camper trailers, 4WD awnings, tents and gazebos. Check the fittings suit your setup before you head off.
Already have some gear, or want more tie down points? Every part of the range is sold on its own too.
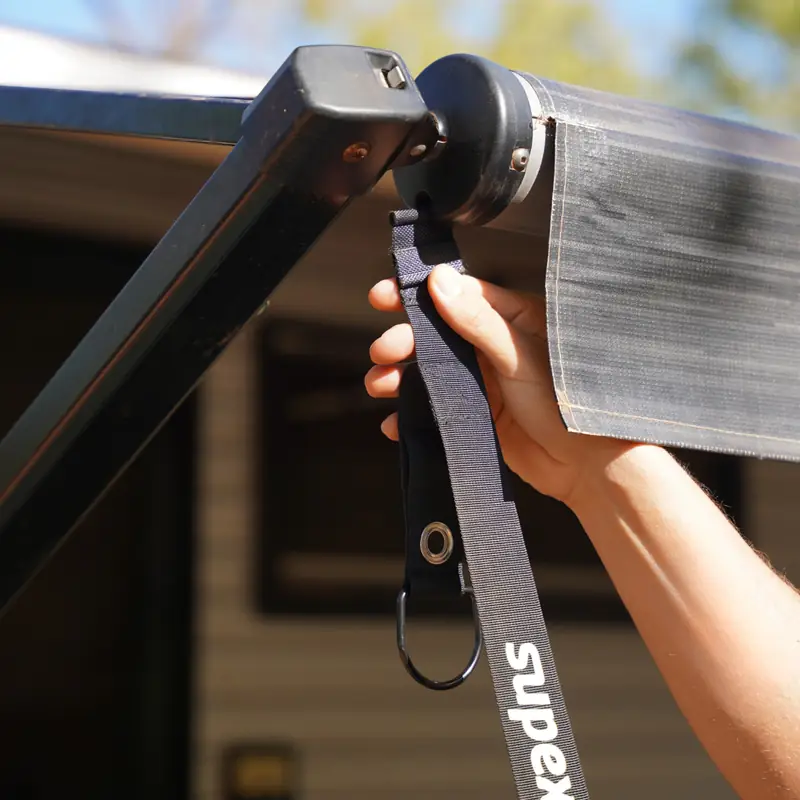
Strap kit
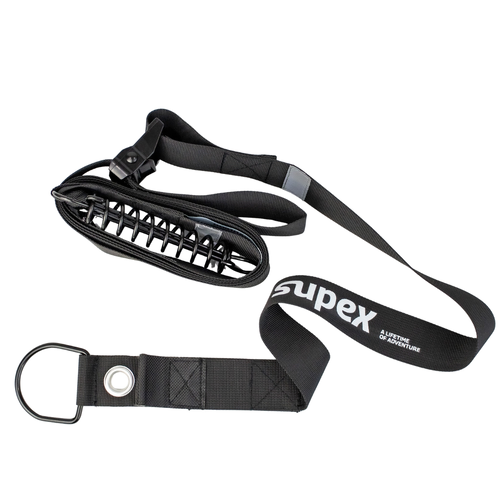
For a firmer hold, the Awning Tie Down Strap Kit gives you two 270cm heavy duty straps. Fit them with the 5mm or 7mm spline in the sail track, or wrap the D-ring around the awning barrel.
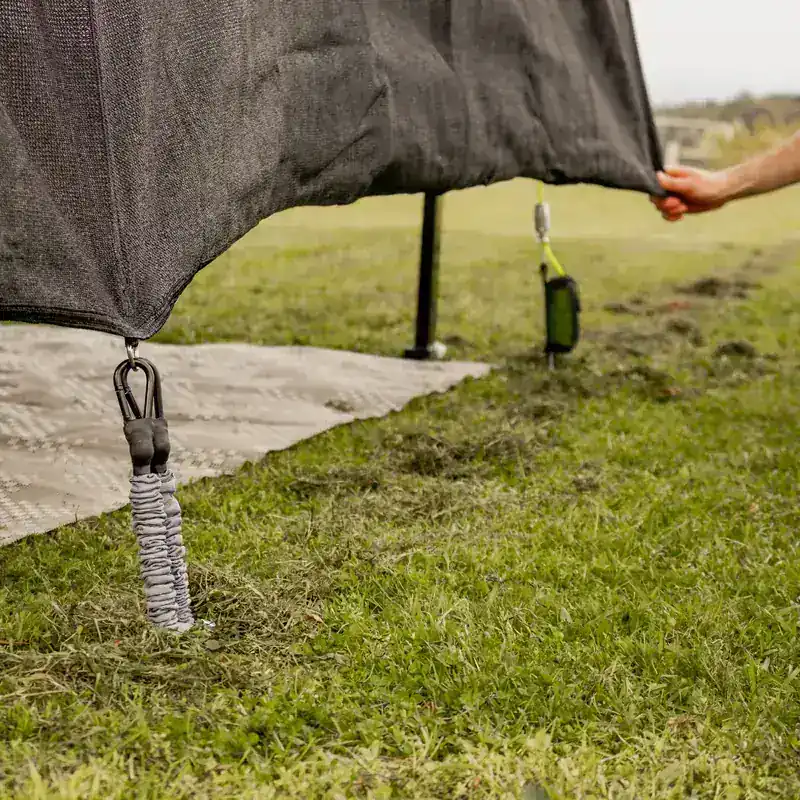
Privacy screens
A privacy screen needs a firm hold, but a little give stops it tearing at the fixing points when it moves in the breeze. Grab the 35cm bungees in a 6 pack for a full screen, or the 60cm bungees in a 2 pack for wider gaps.
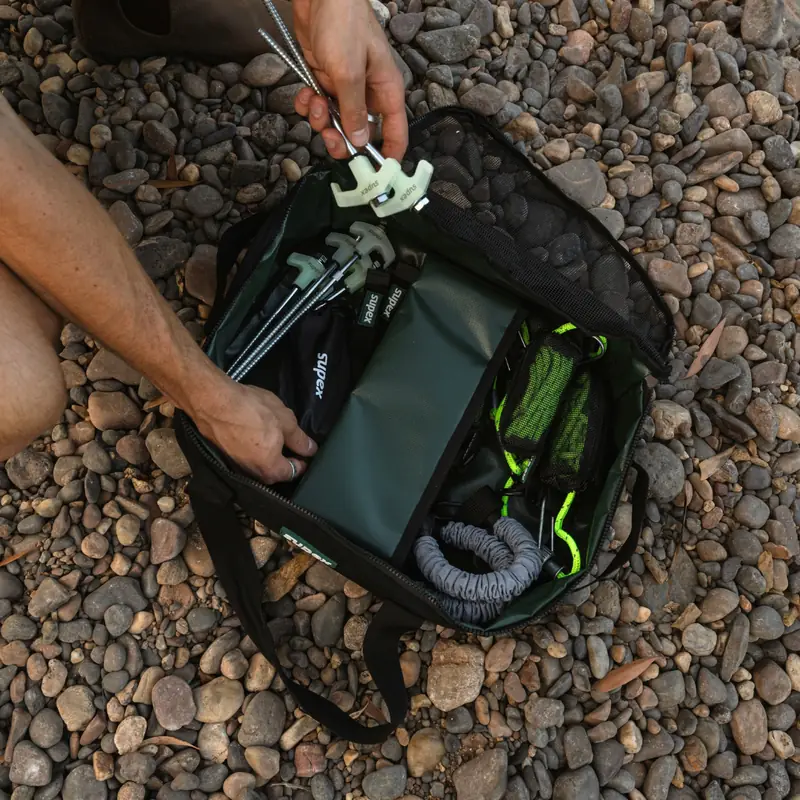
Every part of the range, in one place. See more in Straps & Tie Downs.
Tell us about your awning and how you camp, and we’ll help you pick the right kit. Send us a message.
An Anderson style socket gives you a quick, solid power connection for a fridge, solar panel, power station or battery box. Our 12 Volt Direct panels come in two styles: flush mo...
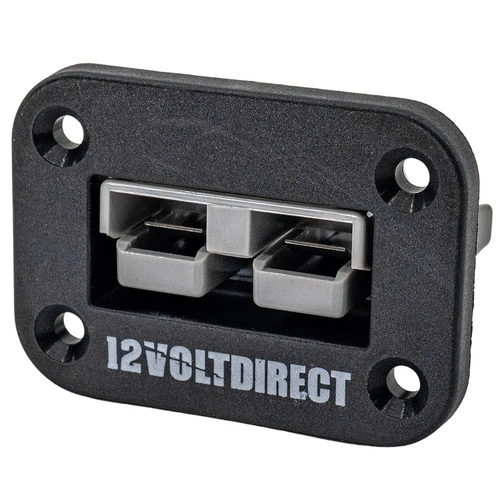
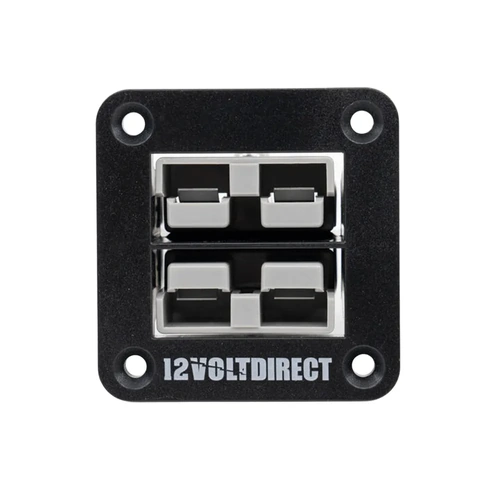
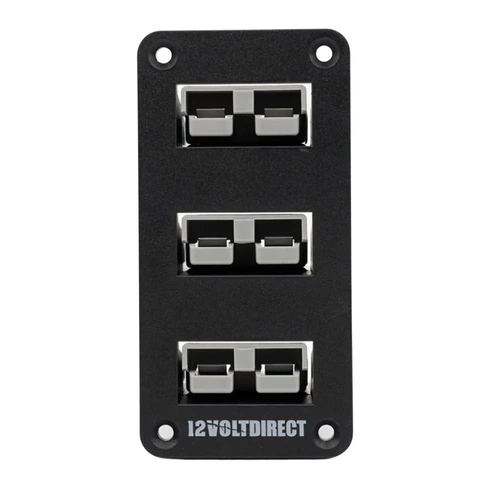
Read articleAn Anderson style socket gives you a quick, solid power connection for a fridge, solar panel, power station or battery box. Our 12 Volt Direct panels come in two styles: flush mount and surface mount.
Both use the same grey 50A rated Anderson style connector. The difference is how they fit to your vehicle, canopy or caravan. Here’s how to pick the right one.
| Flush mount | Surface mount | |
|---|---|---|
| How it fits | Faceplate over a cut-out, plug body behind the panel | Housing screws onto the surface |
| Cutting | A rectangular cut-out the size of the plug body, plus screw holes | Screw holes, plus a hole for the cable |
| Access needed | You need room behind the panel for the plug and cable | No space needed behind the panel |
| Rating | 50A Anderson style connector | 50A Anderson style connector |
| Look | Sits almost flat, very tidy | Raised housing, sits proud of the surface |
| Bumps and snags | Little to catch on | Stands out more, so keep it out of the way of knees and gear |
| Combos available | Single, twin, triple, Anderson + cigarette, Anderson + cigarette + USB | Single, twin, Anderson + cigarette |
All of these are our own 12 Volt Direct panels. See the full range in Panel Mount Sockets.
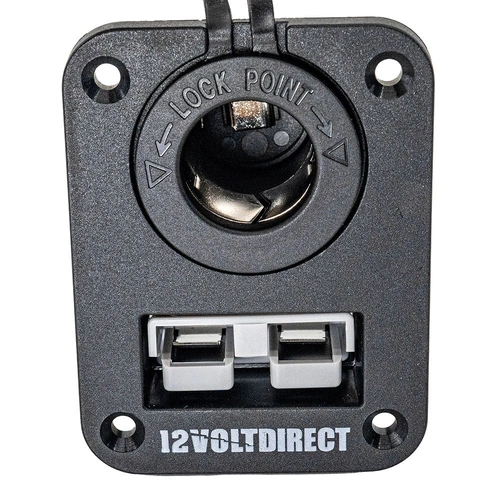
Flush mount
Flush Mount Anderson Style & Cigarette Lighter Socket
One Anderson style socket plus a 12V cigarette socket with a cap
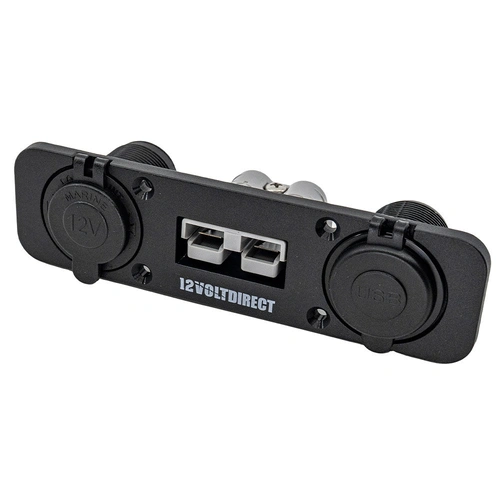
Flush mount
Flush Mount Anderson + Cigarette Lighter + USB Panel
One Anderson style socket, a 12V cigarette socket and a USB socket, each with a cap

Surface mount
Surface Mount Anderson Style Plug / Socket
One Anderson style socket in a moulded housing

Surface mount
Surface Mount Anderson Style Plug & Cigarette Socket
One Anderson style socket plus a 12V cigarette socket with a cap
These panels are just one part of our 12V power connection range. Everything below is available online:
Browse it all in Plugs & Sockets.
Tell us what you’re powering and where it needs to go, and we’ll point you to the right panel. Send us a message.
12 Volt Direct panels
Flush or surface mount, we’ve got the panel for your setup.
A BLUETTI power station is a big purchase, and you can buy one almost anywhere online. So why buy your BLUETTI from 12 Volt Direct? We’re an authorised BLUETTI dealer with a real...
Read articleA BLUETTI power station is a big purchase, and you can buy one almost anywhere online.
So why buy your BLUETTI from 12 Volt Direct? We’re an authorised BLUETTI dealer with a real shop in Sydney, real people to talk to and real 12V know-how.
A bricks and mortar store in Punchbowl. Come in, see the units and pick up your order.
Talk to our Sydney team, not an overseas call centre. Ask us anything.
We ship to every state and territory, from the city to the bush.
Caravans, 4WDs, boats and off-grid setups. We’ll help you size it right.
Power stations, solar, chargers, cables and our own battery tray mounts.
Questions about set-up or charging? Our local team is here to help.
If you’re in Sydney, you don’t have to buy a power station off a screen. Visit our Punchbowl shop to see the BLUETTI range, feel the size and weight of each unit, and talk through your setup with someone who knows 12V systems. You can also order online and pick up from us. Check our contact page for our address and opening hours.
Whether you’re in Perth, Darwin, Hobart or a cattle station in between, you get the same advice and support as a customer who walks in the door. Tell us how you plan to use your BLUETTI and we’ll help you choose before you buy, then ship it to your door.
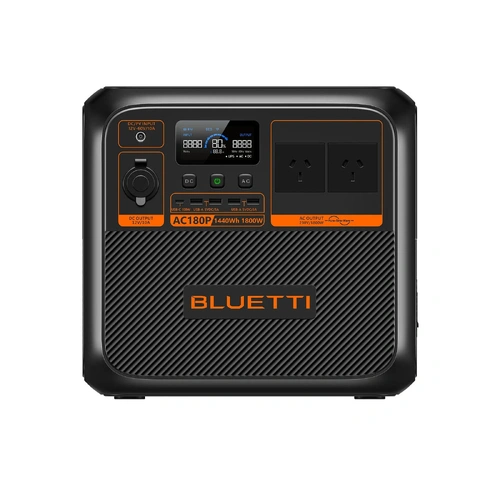
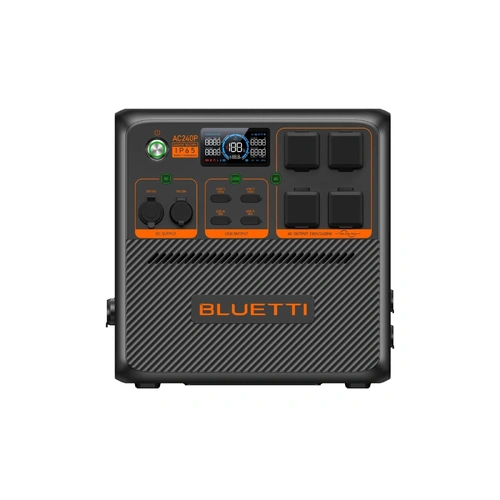
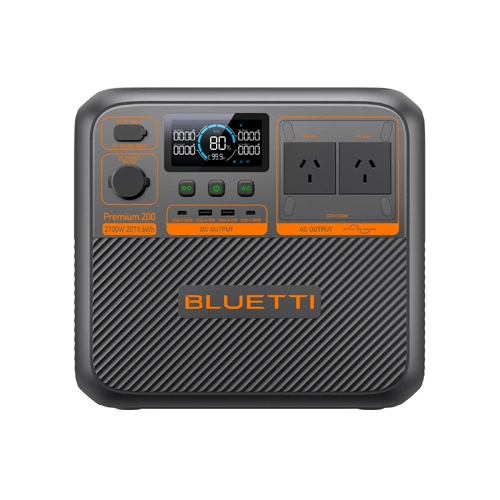
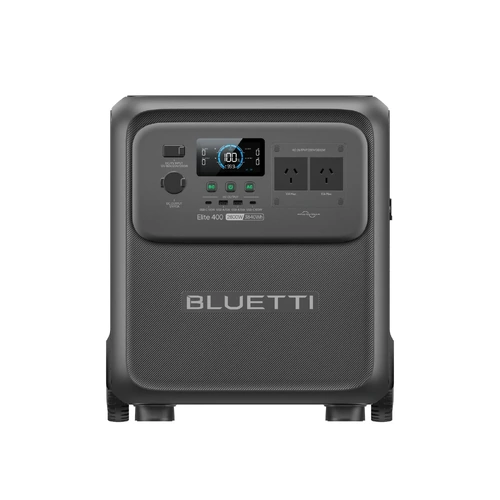
As an authorised dealer, we stock BLUETTI’s Premium range of portable power stations (the ones with the orange front), plus the Apex 300, Elite 400, expansion batteries and solar panels. Here’s a quick guide to which unit suits which job.

2,400W · 2,304Wh · 28.8 kg
Off-grid sites and caravans, expandable with extra batteries

3,840W · 2,764.8Wh · 38 kg
Home backup and large off-grid systems, expandable with B300K batteries
Figures are continuous AC output, battery capacity and weight. All units use long-life LiFePO4 batteries.
Tell us what you want to run, for how long, and how you’ll recharge (solar, your vehicle or mains power). We’ll point you to the right BLUETTI and the bits that go with it, with no hard sell. Send us a message.
Authorised BLUETTI dealer
Sydney shop. Australia-wide delivery. Real people to talk to.
Westinghouse iGen10000AS vs Honda EU70is: The Better Generator for Food Trucks and Trade? The Honda EU70is has long been the default choice for food trucks, coffee vans and trades ...
Read article
The Honda EU70is has long been the default choice for food trucks, coffee vans and trades who need serious quiet power. It is a good generator, but it is no longer the only option at this size. The Westinghouse iGen10000AS makes more power, carries more fuel and weighs less, for around $2,000 less at typical retail prices.
| Westinghouse iGen10000AS | Honda EU70is | |
|---|---|---|
| Starting (maximum) power | 10,000 W | 7,000 W |
| Running (rated) power | 8,200 W | 5,500 W |
| Fuel tank | 30 L | 19.2 L |
| Dry weight | 85 kg | 118.1 kg |
| 32 amp outlet | Yes, plus a 15 amp outlet | Varies by model |
| Price | The iGen10000AS is around $2,000 less at typical retail prices | |
Honda figures are from Honda Australia's published EU70is specifications. Prices vary by retailer.
Starting watts cover the short surge when a motor or compressor kicks in. Running watts are what the generator can supply all day, and that is the number your equipment lives on. The iGen10000AS gives you 8,200 W running, about 2,700 W more than the EU70is. In a food truck, that is the difference between running the coffee machine and the fryer together, or switching one off to use the other.
If you want more power for your money, the Westinghouse iGen10000AS beats the Honda EU70is on running power, fuel capacity and weight, and it costs less. For food trucks, coffee vans, markets and workshops, it is the one we recommend. For work sites that require RCD protection, go the iGen10000PRO.
Not sure it will run your setup? Send us your equipment list and contact our team, and we will check it for you.